Friday, December 31, 2021

Upgrade Non-CDB to Oracle Database 21c (Manual) - Replay Upgrade

Oracle Database 21c, Database 21c, Database Career, Oracle Database Certification, Oracle Database Guides, Oracle Database Learning, Database Skills, Database Job

This article provides an overview of a manual upgrade of an existing non-CDB database to Oracle 21c using Replay Upgrade. Upgrades can be very complicated, so you must always read the upgrade manual, and test thoroughly before considering an upgrade of a production environment.

◉ Assumptions

This article is focused on upgrading a non-CDB database to Oracle 21c. If your starting point is a database using the multitenant architecture, you should be reading this article instead.

Multitenant : Upgrade to Oracle Database 21c (AutoUpgrade)

You should probably be using the AutoUpgrade method to perform this style of upgrade.

Upgrade Non-CDB to Oracle Database 21c (AutoUpgrade)

This article assumes your source database is of a version supported for direct upgrade to 21c.

19c, 18c, 12.2

The non-CDB architecture is desupported in Oracle 21c, so we have two choices when upgrading a non-CDB database to 21c.

- Convert the existing non-CDB database to a PDB in the current version of the database, then do a multitentant upgrade.

- Convert the non-CDB to a PDB in the new version of the database. The new PDB will be upgraded once it is opened.

In this example we are doing a manual upgrade from 19c non-CDB to 21c. The process is very similar for all supported versions.

It's important to have backups of everything before you start! Some of these steps are destructive, and if something goes wrong you have no alternative but to restore from backups and start again.

◉ Prerequisities

Make sure you have all the OS prerequisites in place by running the 21c preinstall package. It probably makes sense to update the remaining packages also.

yum install -y oracle-database-preinstall-21c

yum update -y

◉ Install 21c Software

You can read about the installation process in more detail here (OL7, OL8), but for this example we'll keep it brief. The following commands will perform a silent installation of the 21c software.

export ORACLE_HOME=$ORACLE_BASE/product/21.0.0/dbhome_1

export PATH=$ORACLE_HOME/bin:$PATH

export ORACLE_SID=cdb1

export SOFTWARE_DIR=/u01/software

export ORA_INVENTORY=/u01/app/oraInventory

mkdir -p ${ORACLE_HOME}

cd $ORACLE_HOME

/bin/unzip -oq ${SOFTWARE_DIR}/LINUX.X64_213000_db_home.zip

./runInstaller -ignorePrereq -waitforcompletion -silent                        \

    -responseFile ${ORACLE_HOME}/install/response/db_install.rsp               \

    oracle.install.option=INSTALL_DB_SWONLY                                    \

    ORACLE_HOSTNAME=${ORACLE_HOSTNAME}                                         \

    UNIX_GROUP_NAME=oinstall                                                   \

    INVENTORY_LOCATION=${ORA_INVENTORY}                                        \

    SELECTED_LANGUAGES=en,en_GB                                                \

    ORACLE_HOME=${ORACLE_HOME}                                                 \

    ORACLE_BASE=${ORACLE_BASE}                                                 \

    oracle.install.db.InstallEdition=EE                                        \

    oracle.install.db.OSDBA_GROUP=dba                                          \

    oracle.install.db.OSBACKUPDBA_GROUP=dba                                    \

    oracle.install.db.OSDGDBA_GROUP=dba                                        \

    oracle.install.db.OSKMDBA_GROUP=dba                                        \

    oracle.install.db.OSRACDBA_GROUP=dba                                       \

    SECURITY_UPDATES_VIA_MYORACLESUPPORT=false                                 \

    DECLINE_SECURITY_UPDATES=true

Run the root scripts when prompted.

As a root user, execute the following script(s):

        1. /u01/app/oracle/product/21.0.0/dbhome_1/root.sh

At this point you should also patch the new Oracle home, but in this case we will forgo that step to keep things simple.

◉ Create 21c Container Database

We need to create a container database (CDB) as the destination for the resulting PDB. The following example create a CDB called "cdb1" with no PDBs.

#dbca -silent -deleteDatabase -sourceDB cdb1 -sysDBAUserName sys -sysDBAPassword SysPassword1

dbca -silent -createDatabase \

 -templateName General_Purpose.dbc \

 -gdbname cdb1 -sid cdb1 -responseFile NO_VALUE \

 -characterSet AL32UTF8 \

 -sysPassword SysPassword1 \

 -systemPassword SysPassword1 \

 -createAsContainerDatabase true \

 -numberOfPDBs 0 \

 -databaseType MULTIPURPOSE \

 -memoryMgmtType auto_sga \

 -totalMemory 1536 \

 -storageType FS \

 -datafileDestination "/u02/oracle/" \

 -redoLogFileSize 50 \

 -emConfiguration NONE \

 -ignorePreReqs

Prepare for db operation

10% complete

Copying database files

40% complete

Creating and starting Oracle instance

42% complete

46% complete

52% complete

56% complete

60% complete

Completing Database Creation

66% complete

69% complete

70% complete

Executing Post Configuration Actions

100% complete

Database creation complete. For details check the logfiles at:

 /u01/app/oracle/cfgtoollogs/dbca/cdb1.

Database Information:

Global Database Name:cdb1

System Identifier(SID):cdb1

Look at the log file "/u01/app/oracle/cfgtoollogs/dbca/cdb1/cdb13.log" for further details.

$

We enable the fast recovery area, Oracle Managed Files (OMF) and archivelog mode. We

sqlplus / as sysdba <<EOF

alter system set db_recovery_file_dest_size=40g;

alter system set db_recovery_file_dest='/u01/app/oracle/fast_recovery_area';

alter system set db_create_file_dest = '/u02/oradata';

shutdown immediate;

startup mount;

alter database archivelog;

alter database open;

exit;

EOF

You will need to adjust the instance parameters to make sure the container can cope with the demands of the final PDB, but for this example we will ignore that.

There are two settings necessary for Replay Upgrade to work, but they are the defaults, so we don't need to set these manually.

alter database upgrade sync on;

alter database property set upgrade_pdb_on_open='true';

◉ Create PDB From non-CDB

It would make sense to run the AutoUpgrade analyze before trying the upgrade, to make sure there aren't any issues that might need fixing before you continue. 

We switch the non-CDB instance to read-only mode, describe the database using the DBMS_PDB package, then shutdown the non-CDB instance.

export ORACLE_HOME=$ORACLE_BASE/product/19.0.0/dbhome_1

export PATH=$ORACLE_HOME/bin:$PATH

export ORACLE_SID=mydb

sqlplus / as sysdba <<EOF

shutdown immediate;

startup open read only;

begin

  dbms_pdb.describe(

    pdb_descr_file => '/tmp/mydb.xml');

end;

/

shutdown immediate;

exit;

EOF

We can see there are no user-defined PDBs in the root container.

export ORACLE_HOME=$ORACLE_BASE/product/21.0.0/dbhome_1

export PATH=$ORACLE_HOME/bin:$PATH

export ORACLE_SID=cdb1

sqlplus / as sysdba

SQL> show pdbs

  CON_ID   CON_NAME              OPEN MODE  RESTRICTED

---------- ------------------------------ ---------- ----------

         2     PDB$SEED                        READ ONLY  NO

SQL>

We create a pluggable database from the non-CDB database using the "/tmp/mydb.xml" file. We are using the COPY option, which copies the datafiles to create the new PDB. We could use the MOVE option, which would use the existing files to save space.

create pluggable database mydb using '/tmp/mydb.xml' copy;

We see the following messages in alert log.

2021-08-21T09:59:43.993485+00:00

create pluggable database mydb using '/tmp/mydb.xml' copy

2021-08-21T09:59:44.027947+00:00

Opatch validation is skipped for PDB MYDB (con_id=4)

2021-08-21T09:59:52.674090+00:00

MYDB(4):Endian type of dictionary set to little

****************************************************************

Pluggable Database MYDB with pdb id - 4 is created as UNUSABLE.

If any errors are encountered before the pdb is marked as NEW,

then the pdb must be dropped

local undo-1, localundoscn-0x0000000000000009

****************************************************************

MYDB(4):Pluggable database MYDB pseudo opening

MYDB(4):SUPLOG: Initialize PDB SUPLOG SGA, old value 0x0, new value 0x18

MYDB(4):Autotune of undo retention is turned on.

MYDB(4):Undo initialization recovery: Parallel FPTR complete: start:5860713 end:5860715 diff:2 ms (0.0 seconds)

MYDB(4):Undo initialization recovery: err:0 start: 5860709 end: 5860715 diff: 6 ms (0.0 seconds)

MYDB(4):[18913] Successfully onlined Undo Tablespace 2.

MYDB(4):Undo initialization online undo segments: err:0 start: 5860715 end: 5860764 diff: 49 ms (0.0 seconds)

MYDB(4):Undo initialization finished serial:0 start:5860709 end:5860768 diff:59 ms (0.1 seconds)

MYDB(4):Database Characterset for MYDB is AL32UTF8

MYDB(4):Pluggable database MYDB pseudo closing

MYDB(4):JIT: pid 18913 requesting stop

MYDB(4):Closing sequence subsystem (5860811822).

MYDB(4):Buffer Cache flush started: 4

MYDB(4):Buffer Cache flush finished: 4

Completed: create pluggable database mydb using '/tmp/mydb.xml' copy

Now we open the pluggable database in read-write mode, which triggers the upgrade of the PDB, and conversion from a non-CDB to a PDB. We do not need to run the "noncdb_to_pdb.sql" script for this operation. As you might expect, this upgrade and conversion takes some time to complete. In this example a little over 30 minutes.

alter pluggable database mydb open read write;

We can use the DBA_REPLAY_UPGRADE_ERRORS view to check for errors. In the alert log we see messages to indicate the upgrade and conversion are taking place.

2021-08-21T10:03:35.400676+00:00

alter pluggable database mydb open read write

...

****************************************************************

Post plug operations are now complete.

Pluggable database MYDB with pdb id - 4 is now marked as NEW.

****************************************************************

...

MYDB(4):alter pluggable database application APP$CDB$CATALOG begin upgrade

  '19.0.0.0.0' to '21.0.0.0.0.partial' on error capture

MYDB(4):Completed: alter pluggable database application APP$CDB$CATALOG begin upgrade

  '19.0.0.0.0' to '21.0.0.0.0.partial' on error capture

...

MYDB(4):SERVER ACTION=NONCDB_TO_PDB id=: Converted non-CDB to PDB in release 21.3.0.0.0 Container=MYDB Id=4

MYDB(4):alter pluggable database application app$cdb$pdbonly$ncdbtopdb end upgrade

MYDB(4):Completed: alter pluggable database application app$cdb$pdbonly$ncdbtopdb end upgrade

2021-08-21T10:31:03.540665+00:00

MYDB(4):Finished Conversion from non-CDB on PDB Open

Violations: Type: 2, Count: 1

Pluggable database MYDB opened read write

Completed: alter pluggable database mydb open read write

We can see the PDB is now open in read-write mode.

SQL> show pdbs

  CON_ID   CON_NAME                    OPEN MODE  RESTRICTED

---------- ------------------------------ ---------- ----------

         2      PDB$SEED                       READ ONLY  NO

         4      MYDB                               READ WRITE NO

SQL>

We save the state so the PDB opens automatically with the instance.

alter pluggable database mydb save state;

It's worth checking for violations. They should all be from before the upgrade and conversion.

column name format a10

column message format a60

select time, name, message from pdb_plug_in_violations order by time;

Run datapatch for the PDB.

cd $ORACLE_HOME/OPatch

./datapatch -pdbs MYDB

◉ Final Steps

We need to clean up the remains of the non-CDB instance. We can use the DBCA to do this.

export ORACLE_HOME=$ORACLE_BASE/product/19.0.0/dbhome_1

export PATH=$ORACLE_HOME/bin:$PATH

export ORACLE_SID=mydb

dbca -silent -deleteDatabase -sourceDB mydb -sysDBAUserName sys -sysDBAPassword SysPassword1

Edit the "/etc/oratab" file and any environment files as required.

◉ Appendix

The following commands are used to rebuild the databases if you want to rerun the examples.

Rebuild the CDB1 multitenant database

export ORACLE_HOME=/u01/app/oracle/product/21.0.0/dbhome_1

export PATH=$ORACLE_HOME/bin:$PATH

export ORACLE_SID=cdb1

#dbca -silent -deleteDatabase -sourceDB cdb1 -sysDBAUserName sys -sysDBAPassword SysPassword1

dbca -silent -createDatabase \

 -templateName General_Purpose.dbc \

 -gdbname cdb1 -sid cdb1 -responseFile NO_VALUE \

 -characterSet AL32UTF8 \

 -sysPassword SysPassword1 \

 -systemPassword SysPassword1 \

 -createAsContainerDatabase true \

 -numberOfPDBs 0 \

 -databaseType MULTIPURPOSE \

 -memoryMgmtType auto_sga \

 -totalMemory 1536 \

 -storageType FS \

 -datafileDestination "/u02/oradata/" \

 -redoLogFileSize 50 \

 -emConfiguration NONE \

 -ignorePreReqs

sqlplus / as sysdba <<EOF

alter system set db_recovery_file_dest_size=40g;

alter system set db_recovery_file_dest='/u01/app/oracle/fast_recovery_area';

alter system set db_create_file_dest = '/u02/oradata';

shutdown immediate;

startup mount;

alter database archivelog;

alter database open;

exit;

EOF

Rebuild the MYDB non-CDB database.

export ORACLE_HOME=/u01/app/oracle/product/19.0.0/dbhome_1

export PATH=$ORACLE_HOME/bin:$PATH

export ORACLE_SID=mydb

#dbca -silent -deleteDatabase -sourceDB mydb -sysDBAUserName sys -sysDBAPassword SysPassword1

dbca -silent -createDatabase \

 -templateName General_Purpose.dbc \

 -gdbname mydb -sid mydb -responseFile NO_VALUE \

 -characterSet AL32UTF8 \

 -sysPassword SysPassword1 \

 -systemPassword SysPassword1 \

 -createAsContainerDatabase false \

 -databaseType MULTIPURPOSE \

 -memoryMgmtType auto_sga \

 -totalMemory 1536 \

 -storageType FS \

 -datafileDestination "/u02/oradata/" \

 -redoLogFileSize 50 \

 -emConfiguration NONE \

 -ignorePreReqs

sqlplus / as sysdba <<EOF

alter system set db_recovery_file_dest_size=40g;

alter system set db_recovery_file_dest='/u01/app/oracle/fast_recovery_area';

alter system set db_create_file_dest = '/u02/oradata';

shutdown immediate;

startup mount;

alter database archivelog;

alter database open;

exit;

EOF

Source: oracle-base.com

Thursday, December 30, 2021

Oracle Database 21c Installation On Fedora 34 (F34)

Oracle Database 21c, Fedora 34 (F34), DB Exam Study, Database Exam Prep, Database Preparation, Database Career, Database OTN

This article describes the installation of Oracle Database 21c 64-bit on Fedora 34 (F34) 64-bit. The article is based on a server installation with a minimum of 2G swap and secure Linux set to permissive.

◉ Download Software

Download the Oracle software from OTN or MOS depending on your support status.

- OTN: Oracle Database 21c (21.3) Software (64-bit).

- edelivery: Oracle Database 21c (21.3) Software (64-bit)

◉ Hosts File

The "/etc/hosts" file must contain a fully qualified name for the server.

<IP-address>  <fully-qualified-machine-name>  <machine-name>

For example.

127.0.0.1       localhost localhost.localdomain localhost4 localhost4.localdomain4

192.168.56.141  fedora34.localdomain  fedora34

Set the correct hostname in the "/etc/hostname" file.

fedora34.localdomain

◉ Set Kernel Parameters

Add the following lines to the "/etc/sysctl.conf" file, or in a file called "/etc/sysctl.d/98-oracle.conf".

fs.file-max = 6815744

kernel.sem = 250 32000 100 128

kernel.shmmni = 4096

kernel.shmall = 1073741824

kernel.shmmax = 4398046511104

kernel.panic_on_oops = 1

net.core.rmem_default = 262144

net.core.rmem_max = 4194304

net.core.wmem_default = 262144

net.core.wmem_max = 1048576

net.ipv4.conf.all.rp_filter = 2

net.ipv4.conf.default.rp_filter = 2

fs.aio-max-nr = 1048576

net.ipv4.ip_local_port_range = 9000 65500

Run one of the following commands to change the current kernel parameters, depending on which file you edited.

/sbin/sysctl -p

# Or

/sbin/sysctl -p /etc/sysctl.d/98-oracle.conf

Add the following lines to a file called "/etc/security/limits.d/oracle-database-server-21c-preinstall.conf" file.

oracle   soft   nofile    1024

oracle   hard   nofile    65536

oracle   soft   nproc    16384

oracle   hard   nproc    16384

oracle   soft   stack    10240

oracle   hard   stack    32868

oracle   hard   memlock    134217728

oracle   soft   memlock    134217728

oracle   soft   data    unlimited

oracle   hard   data    unlimited

Stop and disable the firewall. You can configure it later if you wish.

# systemctl stop firewalld

# systemctl disable firewalld

Set SELinux to permissive by editing the "/etc/selinux/config" file, making sure the SELINUX flag is set as follows.

SELINUX=permissive

The server will need a reboot for the change to take effect.

◉ Setup

The following packages are listed as required. Some are commented out as they are not present in the Fedora repository.

dnf install -y bc

dnf install -y binutils

dnf install -y compat-openssl10

dnf install -y elfutils-libelf

dnf install -y glibc

dnf install -y glibc-devel

dnf install -y ksh

dnf install -y libaio

dnf install -y libXrender

dnf install -y libX11

dnf install -y libXau

dnf install -y libXi

dnf install -y libXtst

dnf install -y libgcc

dnf install -y libnsl

dnf install -y libstdc++

dnf install -y libxcb

dnf install -y libibverbs

dnf install -y make

dnf install -y policycoreutils

dnf install -y policycoreutils-python-utils

dnf install -y smartmontools

dnf install -y sysstat

# Added by me.

yum install -y unixODBC

# compat-libpthread-nonshared.

dnf install -y libnsl2

dnf install -y libnsl2.i686

dnf install -y libxcrypt-compat

dnf install -y http://rpmfind.net/linux/fedora/linux/development/rawhide/Everything/x86_64/os/Packages/c/compat-libpthread-nonshared-2.34.9000-13.fc36.x86_64.rpm

# Downgrade binutils to F31.

dnf downgrade -y https://kojipkgs.fedoraproject.org//vol/fedora_koji_archive04/packages/binutils/2.32/33.fc31/x86_64/binutils-gold-2.32-33.fc31.x86_64.rpm \

https://kojipkgs.fedoraproject.org//vol/fedora_koji_archive04/packages/binutils/2.32/33.fc31/x86_64/binutils-2.32-33.fc31.x86_64.rpm

#dnf update -y

Create the new groups and users.

groupadd -g 54321 oinstall

groupadd -g 54322 dba

groupadd -g 54323 oper

#groupadd -g 54324 backupdba

#groupadd -g 54325 dgdba

#groupadd -g 54326 kmdba

#groupadd -g 54328 asmdba

#groupadd -g 54328 asmoper

#groupadd -g 54329 asmadmin

useradd -u 54321 -g oinstall -G dba,oper oracle

passwd oracle

We are not going to use the extra groups, but include them if you do plan on using them.

Create the directories in which the Oracle software will be installed.

mkdir -p /u01/app/oracle/product/21.0.0/dbhome_1

mkdir -p /u02/oradata

chown -R oracle:oinstall /u01 /u02

chmod -R 775 /u01 /u02

Putting mount points directly under root without mounting separate disks to them is typically a bad idea. It's done here for simplicity, but for a real installation "/" storage should be reserved for the OS.

If you are using X Emulation, login as root and issue the following command.

xhost +<machine-name>

You will need to add the following symbolic links or the Oracle Universal Installer (OUI) will not start.

# Fix for Oracle on Fedora.

rm -f /usr/lib64/libnsl.so.1

rm -f /usr/lib/libnsl.so.1

ln -s /usr/lib64/libnsl.so.2.0.1 /usr/lib64/libnsl.so.1

ln -s /usr/lib/libnsl.so.2.0.1 /usr/lib/libnsl.so.1

Set up the environment for the "oracle" user. The "$" characters are escaped using "\". If you are not creating the file with the cat command, you will need to remove the escape characters.

mkdir -p /home/oracle/scripts

cat > /home/oracle/scripts/setEnv.sh <<EOF

# Oracle Settings

export TMP=/tmp

export TMPDIR=\$TMP

export ORACLE_HOSTNAME=fedora34.localdomain

export ORACLE_UNQNAME=cdb1

export ORACLE_BASE=/u01/app/oracle

export ORACLE_HOME=\$ORACLE_BASE/product/21.0.0/dbhome_1

export ORA_INVENTORY=/u01/app/oraInvenotry

export ORACLE_SID=cdb1

export PDB_NAME=pdb1

export DATA_DIR=/u02/oradata

export PATH=/usr/sbin:/usr/local/bin:\$PATH

export PATH=\$ORACLE_HOME/bin:\$PATH

export LD_LIBRARY_PATH=\$ORACLE_HOME/lib:/lib:/usr/lib

export CLASSPATH=\$ORACLE_HOME/jlib:\$ORACLE_HOME/rdbms/jlib

EOF

echo ". /home/oracle/scripts/setEnv.sh" >> /home/oracle/.bash_profile

chown -R oracle:oinstall /home/oracle/scripts

◉ Installation

Log into the oracle user. If you are using X emulation then set the DISPLAY environmental variable.

DISPLAY=<machine-name>:0.0; export DISPLAY

Perform a software-only installation either using interactive mode (GUI) or silent mode and run the root scripts when prompted. Notice the setting of the CV_ASSUME_DISTID environment variable, so fake the OS.

# Unzip software.

cd $ORACLE_HOME

unzip -oq /path/to/software/LINUX.X64_193000_db_home.zip

# Fix for linking error suggested by Steven Kennedy.

cd $ORACLE_HOME/lib/stubs

mv libc.so libc.so.hide

mv libc.so.6 libc.so.6.hide

# Fake OS.

export CV_ASSUME_DISTID=OEL7.6

# Interactive mode.

#./runInstaller

# Silent mode.

./runInstaller -ignorePrereq -waitforcompletion -silent                        \

    -responseFile ${ORACLE_HOME}/install/response/db_install.rsp               \

    oracle.install.option=INSTALL_DB_SWONLY                                    \

    ORACLE_HOSTNAME=${ORACLE_HOSTNAME}                                         \

    UNIX_GROUP_NAME=oinstall                                                   \

    INVENTORY_LOCATION=${ORA_INVENTORY}                                        \

    SELECTED_LANGUAGES=en,en_GB                                                \

    ORACLE_HOME=${ORACLE_HOME}                                                 \

    ORACLE_BASE=${ORACLE_BASE}                                                 \

    oracle.install.db.InstallEdition=EE                                        \

    oracle.install.db.OSDBA_GROUP=dba                                          \

    oracle.install.db.OSBACKUPDBA_GROUP=dba                                    \

    oracle.install.db.OSDGDBA_GROUP=dba                                        \

    oracle.install.db.OSKMDBA_GROUP=dba                                        \

    oracle.install.db.OSRACDBA_GROUP=dba                                       \

    SECURITY_UPDATES_VIA_MYORACLESUPPORT=false                                 \

    DECLINE_SECURITY_UPDATES=true

Run the root scripts when prompted.

As a root user, execute the following script(s):

        1. /u01/app/oraInvenotry/orainstRoot.sh

        2. /u01/app/oracle/product/21.0.0/dbhome_1/root.sh

You are now ready to create a database.

◉ Database Creation

You create a database using the Database Configuration Assistant (DBCA). The interactive mode will display GUI screens to allow user input, while the silent mode will create the database without displaying any screens, as all required options are already specified on the command line.

# Start the listener.

lsnrctl start

# Interactive mode.

# dbca

# Silent mode.

dbca -silent -createDatabase                                                   \

     -templateName General_Purpose.dbc                                         \

     -gdbname ${ORACLE_SID} -sid  ${ORACLE_SID} -responseFile NO_VALUE         \

     -characterSet AL32UTF8                                                    \

     -sysPassword SysPassword1                                                 \

     -systemPassword SysPassword1                                              \

     -createAsContainerDatabase true                                           \

     -numberOfPDBs 1                                                           \

     -pdbName ${PDB_NAME}                                                      \

     -pdbAdminPassword PdbPassword1                                            \

     -databaseType MULTIPURPOSE                                                \

     -memoryMgmtType auto_sga                                                  \

     -totalMemory 2000                                                         \

     -storageType FS                                                           \

     -datafileDestination "${DATA_DIR}"                                        \

     -redoLogFileSize 50                                                       \

     -emConfiguration NONE                                                     \

     -ignorePreReqs

◉ Post Installation

Edit the "/etc/oratab" file setting the restart flag for each instance to 'Y'.

cdb1:/u01/app/oracle/product/21.0.0/dbhome_1:Y

Source: oracle-base.com
Wednesday, December 29, 2021

Session settings and timeouts in OCI

The following question in the Oracle Groundbreakers Developer Community forum made me investigate on how to change the session timeout in the Oracle Cloud console. Have a look, it is still for some reason unanswered:

Oracle Database, Oracle Database Exam, Oracle Database Exam Prep, Oracle Database Exam Preparation, Oracle Database Career, Oracle Database Guides, Oracle Database Certification, Oracle Database Learning

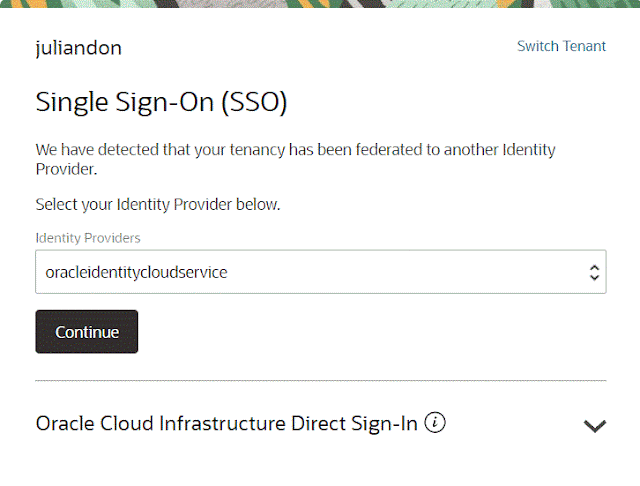
For those who use Oracle Cloud Infrastructure on daily basis, they know that the default session timeout is 480 minutes although in my case it is an hour – so often after you switch to the OCI tab, you see the following screen:

Oracle Database, Oracle Database Exam, Oracle Database Exam Prep, Oracle Database Exam Preparation, Oracle Database Career, Oracle Database Guides, Oracle Database Certification, Oracle Database Learning

Here is the way how you can change it to a longer period with 32767 minutes being the maximum allowed.

Step 1: Open the Service User Console

Oracle Database, Oracle Database Exam, Oracle Database Exam Prep, Oracle Database Exam Preparation, Oracle Database Career, Oracle Database Guides, Oracle Database Certification, Oracle Database Learning

Step 2: Open the Identity Cloud Service Admin Console:

Oracle Database, Oracle Database Exam, Oracle Database Exam Prep, Oracle Database Exam Preparation, Oracle Database Career, Oracle Database Guides, Oracle Database Certification, Oracle Database Learning

Step 3: From the Dashboard, choose “Settings” and from there “Session Settings”:

Oracle Database, Oracle Database Exam, Oracle Database Exam Prep, Oracle Database Exam Preparation, Oracle Database Career, Oracle Database Guides, Oracle Database Certification, Oracle Database Learning

Step 4: Set the “Session Duration” to a longer period of time:

Oracle Database, Oracle Database Exam, Oracle Database Exam Prep, Oracle Database Exam Preparation, Oracle Database Career, Oracle Database Guides, Oracle Database Certification, Oracle Database Learning

Step 5: Saving the settings to the new value: I chose the maximum which is 32767 minutes:

Oracle Database, Oracle Database Exam, Oracle Database Exam Prep, Oracle Database Exam Preparation, Oracle Database Career, Oracle Database Guides, Oracle Database Certification, Oracle Database Learning

Note that there are other setting besides session session: user settings, default settings and partner settings.

Oracle Database, Oracle Database Exam, Oracle Database Exam Prep, Oracle Database Exam Preparation, Oracle Database Career, Oracle Database Guides, Oracle Database Certification, Oracle Database Learning

You can try also the Console Settings (thanks to Simo Vilmunen) but there I am getting a show stopper:

Oracle Database, Oracle Database Exam, Oracle Database Exam Prep, Oracle Database Exam Preparation, Oracle Database Career, Oracle Database Guides, Oracle Database Certification, Oracle Database Learning

Source: juliandontcheff.wordpress.com

Tuesday, December 28, 2021

Advice On How to Prepare for the Oracle 1Z0-1094-21 Certification Exam

1z0-1094-21, oracle cloud database migration and integration 2021 specialist (1z0-1094-21), 1z0-1094-21 dumps, 1z0-1094-21 sample questions, 1z0-1094-21 free dumps, 1z0-1094-21 dump, oracle cloud database migration and integration specialist, oracle cloud database migration and integration 2021 specialist, oracle cloud database migration and integration 2021 specialist dumps, oracle cloud database migration and integration 2021 certified specialist

An Oracle Cloud Database Migration and Integration 2021 Specialist (1Z0-1094-21) has the skills to migrate database instances to the Oracle Cloud, including Autonomous DB and Cloud Database Services, and implement data integration. Depending on the source and target database options, they understand the requirements and architecture. They can use multiple migration methods, such as RMAN, Data Pump, Cloning, SQL Dev, GoldenGate, and Oracle Zero Downtime Migration. Training & hands-on experience is strongly recommended.

Migrating Oracle Databases is a critical component of all application migrations. Learn about the database migration and mechanics of performing a migration, including target database selection, migration strategies, performance measurement, monitoring, and more.

1Z0-1094-21 Exam Pattern

In the Oracle 1Z0-1094-21 exam, the candidates are given 50 multiple choice questions of a different kind. They have to solve all the 50 questions in under 90 minutes. The passing score is 70%. The students will have to take the 1Z0-1094-21 certification in Oracle's centers. The candidates will be judged by the practical and the theoretical ability to give the exam.

The Preparation Strategy to Score High in the 1Z0-1094-21 Certification Exam

1Z0-1094-21 1Z0-1094-21 CERTIFICATION 1Z0-1094-21 EXAM 1Z0-1094-21 PRACTICE EXAM 1Z0-1094-21 SAMPLE QUESTIONS ORACLE CLOUD DATABASE MIGRATION AND INTEGRATION 2021 SPECIALIST

Oracle 1Z0-1094-21 exam requires a lot of dedication and hard work since the paper is specially designed to test the in-depth knowledge of the candidate. The candidates need to score 65% marks to pass the Oracle 1Z0-1094-21 certification, and hence it would be best to have a proper study strategy to achieve well.

1. Read the 1Z0-1094-21 Exam Syllabus

The first step is downloading and printing the Oracle website's syllabus. Now read the syllabus thoroughly and make notes of all the topics given. It would be best if you recognized the 1Z0-1094-21 exam syllabus at all times so that you do not miss any topic during preparation.

2. Get the Course Material

Get the study material. You can decide what kind of study material you want according to your preferences. You can get physical books to read and give the 1Z0-1094-21 exam. You can also download online study material such as online books, lecture videos, and much more to prepare. You can also take the help of the online 1Z0-1094-21 practice exams if you think they are helpful for you.

Also Read: 1Z0-1094-21: Oracle Cloud Database Migration and Integration Exam | Ace Using Sample Questions & Real-Time Practice Tests

3. Make a Study Plan

It would be best to make a study plan after assessing the course material and the topics. If you are well aware of everything given in the course, you will take less time to finish and be prepared. However, if you are starting from scratch, you should begin early. You can also join instructor-led training classes to be taught tips and tricks to pass the Oracle 1Z0-1094-21 certification exam effortlessly.

4. Be Consistent

Be consistent with your preparation, or you might end up forgetting what you have already studied. Keep revising regularly and keep a tab of everything you have already learned. It would be best if you made notes.

5. Take an Online 1Z0-1094-21 Practice Exams

Take 1Z0-1094-21 practice exams as much as you can. Taking practice exams is the best way to prepare yourself for an Oracle exam. The online practice exams from the online portals or solve the practice 1Z0-1094-21 questions there will quickly assess yourself and your preparations.

Put a lot of action into this practice test to make this one of the best practice tests for Cloud Database Migration and Integration Specialist certification.

6. 1Z0-1094-21 Certification Training

The Oracle 1Z0-1094-21 exam is a training course and certification for database developers looking to advance their careers. The Oracle 1Z0-1094-21 exam comprises multiple modules that will effectively test your knowledge of using the Oracle database. You need to pass all the Cloud Database Migration and Integration Specialist exam modules to become certified.

7. Register Only When Ready

Do not register for the exam when you are not ready. If you think you need more time, pick a date that gives you enough time to prepare.

8. Do Not Skip Questions During 1Z0-1094-21 Certification Exam

If you get to a question and have no idea about the answer, pick one at random, mark the question and move on. You cannot afford to waste time agonizing over it. Unanswered questions are always wrong. Answering it at least gives you a chance of getting it correct.

Summary

In preparing your 1Z0-1094-21 study plan, assess yourself and analyze which departments you need to focus on for your review. Your goal must bridge the gap between your strengths and weaknesses in Oracle Cloud Database 2021. And make sure to set a realistic study schedule and adhere to it. An hour or two a day is okay; it all relies on you and how much time you can dedicate to your review daily.

The 1Z0-1094-21 certification exam is a massive step in your career as a project manager or a business person. With the proper preparations and self-discipline, you will be able to pass the 1Z0-1094-21 exam and become a Cloud Database Migration and Integration Specialist.

Monday, December 27, 2021

SQL Trace and X-ADG in the Oracle Autonomous Database

Two very different in nature but equality useful features are now available in the Oracle Autonomous Database:

1. SQL Tracing in Autonomous Database

2. Cross-Region Autonomous Data Guard in ADB-S

Here is how to enable and use them:

SQL Trace in ADB:

You need first a standard bucket as SQL tracing files are only supported with buckets created in the standard storage tier. Also, create a token (you can have at most 2 tokens) and do not use your OCI password when creating the credentials.

SQL Trace, X-ADG, Oracle Autonomous Database, Oracle Database Exam Prep, Oracle Database Preparation, Oracle Database Certification, Oracle Database Career, Database Preparation, Database Exam

Next, you have to create a credential for your Cloud Object Storage account. Note the full username below – do not simply use the one with what you login to the console.

SQL Trace, X-ADG, Oracle Autonomous Database, Oracle Database Exam Prep, Oracle Database Preparation, Oracle Database Certification, Oracle Database Career, Database Preparation, Database Exam

BEGIN
  DBMS_CLOUD.CREATE_CREDENTIAL(
    credential_name => 'JULIANDON_CREDENTIAL',
    username => 'oracleidentitycloudservice/juliandon@yahoo.com', 
    password => 'generated_token'
);
END;
/

PL/SQL procedure successfully completed.

Afterwards, set the init.ora parameters DEFAULT_LOGGING_BUCKET to specify the Cloud Object Storage URL for a bucket for SQL trace files:

SET DEFINE OFF;
ALTER DATABASE PROPERTY SET 
   DEFAULT_LOGGING_BUCKET = 'https://objectstorage.eu-frankfurt-1.oraclecloud.com/n/juliandon/b/adbkofa/o/';
 
Database altered.

Next, specify the credentials to access the Cloud Object Storage. Note that although I am doing this as the ADMIN user, I still have to prefix the credential with ADMIN. Otherwise, you get an error message.

ALTER DATABASE PROPERTY SET DEFAULT_CREDENTIAL = 'ADMIN.JULIANDON_CREDENTIAL';
 
Database altered.

Before we can enable SQL trace, we configure the database to save SQL Trace files:

exec DBMS_SESSION.SET_IDENTIFIER('sqltrace_jd');
 
PL/SQL procedure successfully completed.
 
exec DBMS_APPLICATION_INFO.SET_MODULE('module_jmd', null);
 
PL/SQL procedure successfully completed.
 
ALTER SESSION SET SQL_TRACE = TRUE;

After running the SQLs, disable SQL tracing so that the collected data for the session is written to a table in your session and to a trace file in the bucket you configured when you set up SQL trace.

ALTER SESSION SET SQL_TRACE = FALSE;
ALTER DATABASE PROPERTY SET DEFAULT_LOGGING_BUCKET = '';

The SQL Trace facility writes the trace data collected in the session to Cloud Object Store in the following format:

default_logging_bucket/sqltrace/clientID/moduleName/sqltrace_numID1_numID2.trc

When you enable SQL Tracing, the same trace information that is saved to the trace file on Cloud Object Store is available in the SESSION_CLOUD_TRACE view in the session where the tracing was enabled.

SELECT trace FROM SESSION_CLOUD_TRACE ORDER BY row_number;

After you close the session, the data is no longer available in SESSION_CLOUD_TRACE.

DESC SESSION_CLOUD_TRACE
 
Name       Null? Type
---------- ----- ------------------------------
ROW_NUMBER       NUMBER
TRACE            VARCHAR2(32767)

Cross-Region Autonomous Data Guard in ADB-S

Autonomous Data Guard provides a standby database instance in a different availability domain in the same region or in a standby database instance in different region.

If you create the standby database in the current/local region and if the primary instance becomes unavailable – the Autonomous Database automatically switches the role of the standby database to primary and begins recreating a new standby database.

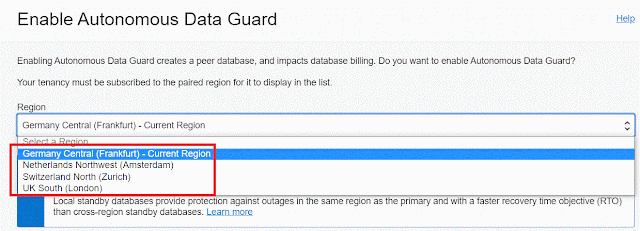
ADB currently supports up to 2 standby databases – a local one in the same-region and an additional one which is remote – called cross-region.

So, with the new cross-region standby database, you can perform a manual failover to the standby database if the current region goes down.

SQL Trace, X-ADG, Oracle Autonomous Database, Oracle Database Exam Prep, Oracle Database Preparation, Oracle Database Certification, Oracle Database Career, Database Preparation, Database Exam

Note that each region has one or a few nearby paired regions in which a remote standby may be created. As you can see from the screenshot above my tenancy in Frankfurt is subscribed to 3 remote regions in which I can create a remote standby.

SQL Trace, X-ADG, Oracle Autonomous Database, Oracle Database Exam Prep, Oracle Database Preparation, Oracle Database Certification, Oracle Database Career, Database Preparation, Database Exam

It is important to know that ADB-S does not allow us access to the standby databases but after a switchover or failover, the database wallet downloaded in the primary database region can be used in the remote region.

It is extremely simple to manually switchover to the other region – in my case from Frankfurt to Zurich, just with a click of a button:

SQL Trace, X-ADG, Oracle Autonomous Database, Oracle Database Exam Prep, Oracle Database Preparation, Oracle Database Certification, Oracle Database Career, Database Preparation, Database Exam

Source: juliandontcheff.wordpress.com

Friday, December 24, 2021

Simple Oracle Document Access (SODA) in the Autonomous JSON Database

“I ordered a soda – caffeine-free, low sodium, no artificial flavors. They brought me a glass of water.” – Robert E. Murray

SODA is a set of NoSQL-style APIs that let you create and store collections of documents in Oracle Database, retrieve them, and query them, without needing to know Structured Query Language (SQL) or how the data in the documents is stored in the database.

Oracle database stores, manages, and indexes JSON documents, and developers can access these via document-oriented APIs in a NoSQL style.

Oracle Document Access (SODA), Autonomous JSON Database, Oracle Database Exam Prep, Oracle Database Exam Preparation, Database Exam Study, Database Skills, Database Career, Oracle Database JSON, Oracle Database Job

A recent white paper written by Vlad Kamys, Francesc Mas and Sai Penumuru explained how to modernize your applications and increase business resilience and security with JSON on Oracle Database, and new cloud-based Oracle Autonomous JSON Database.

Here are few examples on how to use JSON and SODA in the Oracle Autonomous Database.

From the Tools tab, start “Database Actions”, and then select “SQL”:

Oracle Document Access (SODA), Autonomous JSON Database, Oracle Database Exam Prep, Oracle Database Exam Preparation, Database Exam Study, Database Skills, Database Career, Oracle Database JSON, Oracle Database Job

The following below are typical SODA commands:

(1) list the collections

(2) create the EMP collection

(5), (6) and (7) insert three JSON documents into the collection

(10) gets all documents where the name is “Francesc”

(11) gets all documents where the salary is greater than 300

(12) gets all documents where the jobs starts with “D”

(13) gets all documents where the jobs contains the string “play”

Oracle Document Access (SODA), Autonomous JSON Database, Oracle Database Exam Prep, Oracle Database Exam Preparation, Database Exam Study, Database Skills, Database Career, Oracle Database JSON, Oracle Database Job

Here is the output from command extracting all documents where the jobs starts with “D”:

Oracle Document Access (SODA), Autonomous JSON Database, Oracle Database Exam Prep, Oracle Database Exam Preparation, Database Exam Study, Database Skills, Database Career, Oracle Database JSON, Oracle Database Job

If we do not have a text index on “job”, then we get an ORA-40467:

Oracle Document Access (SODA), Autonomous JSON Database, Oracle Database Exam Prep, Oracle Database Exam Preparation, Database Exam Study, Database Skills, Database Career, Oracle Database JSON, Oracle Database Job

We can also run standard SQL on the EMP table which gets created as a result of creating the collection:

Oracle Document Access (SODA), Autonomous JSON Database, Oracle Database Exam Prep, Oracle Database Exam Preparation, Database Exam Study, Database Skills, Database Career, Oracle Database JSON, Oracle Database Job

Here is how to get the output from EMP by using JSON_VALUE:

Oracle Document Access (SODA), Autonomous JSON Database, Oracle Database Exam Prep, Oracle Database Exam Preparation, Database Exam Study, Database Skills, Database Career, Oracle Database JSON, Oracle Database Job

You can think of SODA as a programming bridge between the NoSQL model and the relational model.

There is also the DBMS_SODA package in the database. You can drop the EMP collection simply with “soda drop emp” but you can also run select DBMS_SODA.DROP_COLLECTION(’emp’) from dual; The function will return 1 when it succeeds and 0 when it fails.

Work with JSON Documents in Autonomous Database provides examples of how Java code opens a SODA collection of cart documents, how to use SQL with a SODA collection, etc.

Finally, there is JSON DB/SODA DB Health-Check Script that is a tool developed by Oracle Support Services. The tool, also known as jsonsodadb_hc, is used to check the environment in which a single SQL statement runs, checking for the current status of JSON DB and SODA DB components, makes recommendations based on current settings and checks if the components are being used.

Source: juliandontcheff.wordpress.com

Wednesday, December 22, 2021

Operating System access from within the Autonomous Database

Oracle Autonomous Database does not let us access the operating system. Not even DBA access is allowed.

Operating System, Oracle Autonomous Database, Oracle Database Exam Prep, Oracle Database Learning, Oracle Database Career, Database Exam, Database Exam Study

So, how can we view the content of ADB log or trace files from the OS? How about the alert.log file? “Not needed as all is autonomous” is the common answer. But that is not good enough for most DBAs.

Since September 2021, SQL Trace is supported in the Autonomous Database. If DBAs enable SQL Trace, the same tracing information saved to the trace file on Cloud Object Store is available in the SESSION_CLOUD_TRACE view in the session where the tracing was enabled.

When you enable SQL Tracing, the same trace information that is saved to the trace file on Cloud Object Store is available in the SESSION_CLOUD_TRACE view in the session where the tracing was enabled.

But how about other trace files? It is still possible via Oracle’s internal views. In fact, we don’t have access directly to the V_$ views but rather to their V$ synonyms.

Full access is available to V$DIAG_OPT_TRACE_RECORDS, V$DIAG_SQL_TRACE_RECORDS, V$DIAG_SESS_SQL_TRACE_RECORDS and V$DIAG_SESS_OPT_TRACE_RECORDS.

The names of the trace files and their content is visible through V$DIAG_TRACE_FILE_CONTENTS:

Operating System, Oracle Autonomous Database, Oracle Database Exam Prep, Oracle Database Learning, Oracle Database Career, Database Exam, Database Exam Study

We can see the contents of a a given trace file, say eqp12pod2_p009_193404.trc. The file has 253 lines, so here is a screenshot from the top of the file content:

Operating System, Oracle Autonomous Database, Oracle Database Exam Prep, Oracle Database Learning, Oracle Database Career, Database Exam, Database Exam Study

We can view the latest trace files generated by the database from V$DIAG_TRACE_FILE:

Operating System, Oracle Autonomous Database, Oracle Database Exam Prep, Oracle Database Learning, Oracle Database Career, Database Exam, Database Exam Study

How about the alert.log file? The content is in X$DBGALERTEXT:

select to_char(ORIGINATING_TIMESTAMP,'YYYYMMDD-HH24:MI:SS'), MESSAGE_TEXT
from X$DBGALERTEXT
order by RECORD_ID;

However, in ADB, we do not have access to X$DBGALERTEXT. Good news is that we have access to V$DIAG_ALERT_EXT which shows the contents of the XML-based alert log in the Automatic Diagnostic Repository (ADR) for the current container (PDB). V$DIAG_ALERT_EXT which came in 12.2 is sort of a subset of X$DBGALERTEXT. Here is how you can search for ORA- errors. Use:

SELECT ORIGINATING_TIMESTAMP, MESSAGE_LEVEL, MESSAGE_TEXT, PROBLEM_KEY
FROM V$DIAG_ALERT_EXT
WHERE MESSAGE_TEXT LIKE '%ORA-%' AND ORIGINATING_TIMESTAMP > sysdate-7
ORDER BY ORIGINATING_TIMESTAMP DESC;

to find the ORA- errors during the past week.

Possible level message values are:

1: CRITICAL: critical errors
2: SEVERE: severe errors
8: IMPORTANT: important message
16: NORMAL: normal message

Operating System, Oracle Autonomous Database, Oracle Database Exam Prep, Oracle Database Learning, Oracle Database Career, Database Exam, Database Exam Study

And here is how to see the top of the alert.log file content from the last 24 hours:

SELECT to_char(ORIGINATING_TIMESTAMP,'DD.MM.YYYY-HH24:MI:SS')||': '||MESSAGE_TEXT as "alert.log"
FROM V$DIAG_ALERT_EXT
WHERE ORIGINATING_TIMESTAMP > sysdate-1
ORDER BY ORIGINATING_TIMESTAMP DESC;

Regardless of the fact that we do not have server OS access, we can still create directories from within the Autonomous Database.

CREATE DIRECTORY creates the database directory object and also creates the file system directory if it does not already exist. If the file system directory exists then CREATE DIRECTORY only creates the database directory object.

It is possible also to create subdirectories. For example, the following command creates the database directory object version_patches and the file system directory version/patches:

CREATE DIRECTORY version_patches AS 'version/patches;

You can list the contents of a directory in the Autonomous Database by using the function DBMS_CLOUD.LIST_FILES.

The following query lists the contents of the VERSION directory:

SELECT * FROM DBMS_CLOUD.LIST_FILES('VERSION');

Starting with Oracle Database 21c, Data Pump can perform exports from Oracle Autonomous Database into dump files in a cloud object store.

Thus, now we can easily migrate data out from an Oracle Autonomous Database and import it into another location.

Here is an example assuming that we have already created the credential_name JMD_OBJ_STORE_CRED:

Operating System, Oracle Autonomous Database, Oracle Database Exam Prep, Oracle Database Learning, Oracle Database Career, Database Exam, Database Exam Study

Details on how to create the credentials can be found in the Oracle Cloud Infrastructure User Guide which has “only” 5952 pages!

Beware Bug 33323028 – DATA PUMP EXPORT TO OCI OBJECT STORAGE FAILS – present even in 21.4 – Object store ODM Library is not enabled by default – How To Setup And Use DBMS_CLOUD Package (Doc ID 2748362.1)

Source: juliandontcheff.wordpress.com