Showing posts with label AppDev. Show all posts

Monday, April 15, 2024

Where is the Complexity?

Where is the Complexity?

One of the common arguments I hear about avoiding XA distributed transactions is due to their complexity. In this series of blog posts I’ll examine that claim by looking at three versions of the same application. The first version of the application ignores data consistency issues and operates as though failures essentially don’t occur. This unfortunately is a pretty common practice due to the perceived complexity of introducing distributed transactions into an application. The second version adopts the saga pattern that is all the rage. It uses Eclipse MicroProfile Long Running Actions to implement the saga. Unlike the toy examples used to illustrate how sagas work, this version will include the necessary logic to actually be able to complete or compensate a transaction. Finally, the third version will use the XA pattern to ensure data consistency.

Basic Problem to Solve


The application I’ll use to illustrate the issues associated with ensuring data consistency is one that provides the transfer of money from one account to another account where each account is serviced by a different microservice. Fundamentally a very simple application if you ignore failures. The flow is basically a Transfer microservice:

1. Accepts a request to transfer an amount of money from one account to another account
2. Makes a request to withdraw the amount from the first account
3. Makes a request to deposit the amount in the second account
4. Returns success

Where is the Complexity?

A very simple application, what could possibly go wrong?

Simplistic Application Without Considering Failures


Let’s look first at a possible simple Transfer microservice. It offers a single service named “transfer”, which transfers money from an account in one microservice (department1) to an account in a different microservice (department2). Here is a simple Spring Boot based teller service that handles transferring the money:

@RestController
@RequestMapping("/transfers")
@RequestScope
public class TransferResource {

    private static final Logger LOG = LoggerFactory.getLogger(TransferResource.class);

    @Autowired
    RestTemplate restTemplate;

    @Value("${departmentOneEndpoint}")
    String departmentOneEndpoint;

    @Value("${departmentTwoEndpoint}")
    String departmentTwoEndpoint;

    @RequestMapping(value = "transfer", method = RequestMethod.POST)
    public ResponseEntity<?> transfer(@RequestBody Transfer transferDetails) throws TransferFailedException {
        ResponseEntity<String> withdrawResponse = null;
        ResponseEntity<String> depositResponse = null;

        LOG.info("Transfer initiated: {}", transferDetails);
        try {
            withdrawResponse = withdraw(transferDetails.getFrom(), transferDetails.getAmount());
            if (!withdrawResponse.getStatusCode().is2xxSuccessful()) {
                LOG.error("Withdraw failed: {} Reason: {}", transferDetails, withdrawResponse.getBody());
                throw new TransferFailedException(String.format("Withdraw failed: %s Reason: %s", transferDetails, withdrawResponse.getBody()));
            }
        } catch (Exception e) {
            LOG.error("Transfer failed as withdraw failed with exception {}", e.getLocalizedMessage());
            throw new TransferFailedException(String.format("Withdraw failed: %s Reason: %s", transferDetails, Objects.nonNull(withdrawResponse) ? withdrawResponse.getBody() : withdrawResponse));
        }

        try {
            depositResponse = deposit(transferDetails.getTo(), transferDetails.getAmount());
            if (!depositResponse.getStatusCode().is2xxSuccessful()) {
                LOG.error("Deposit failed: {} Reason: {} ", transferDetails, depositResponse.getBody());
                LOG.error("Reverting withdrawn amount from account {}, as deposit failed.", transferDetails.getFrom());
                redepositWithdrawnAmount(transferDetails.getFrom(), transferDetails.getAmount());
                throw new TransferFailedException(String.format("Deposit failed: %s Reason: %s ", transferDetails, depositResponse.getBody()));
            }
        } catch (Exception e) {
            LOG.error("Transfer failed as deposit failed with exception {}", e.getLocalizedMessage());
            LOG.error("Reverting withdrawn amount from account {}, as deposit failed.", transferDetails.getFrom());
            redepositWithdrawnAmount(transferDetails.getFrom(), transferDetails.getAmount());
            throw new TransferFailedException(String.format("Deposit failed: %s Reason: %s ", transferDetails, Objects.nonNull(depositResponse) ? depositResponse.getBody() : depositResponse));
        }
        LOG.info("Transfer successful: {}", transferDetails);
        return ResponseEntity
                .ok(new TransferResponse("Transfer completed successfully"));
    }
    
    /**
     * Send an HTTP request to the service to withdraw amount from the provided account identity
     *
     * @param accountId The account Identity
     * @param amount    The amount to be withdrawn
     */
    private void redepositWithdrawnAmount(String accountId, double amount) {
        URI departmentUri = UriComponentsBuilder.fromUri(URI.create(departmentOneEndpoint))
                .path("/accounts")
                .path("/" + accountId)
                .path("/deposit")
                .queryParam("amount", amount)
                .build()
                .toUri();

        ResponseEntity<String> responseEntity = restTemplate.postForEntity(departmentUri, null, String.class);
        LOG.info("Re-Deposit Response: \n" + responseEntity.getBody());
    }

    /**
     * Send an HTTP request to the service to withdraw amount from the provided account identity
     *
     * @param accountId The account Identity
     * @param amount    The amount to be withdrawn
     * @return HTTP Response from the service
     */
    private ResponseEntity<String> withdraw(String accountId, double amount) {
        URI departmentUri = UriComponentsBuilder.fromUri(URI.create(departmentOneEndpoint))
                .path("/accounts")
                .path("/" + accountId)
                .path("/withdraw")
                .queryParam("amount", amount)
                .build()
                .toUri();

        ResponseEntity<String> responseEntity = restTemplate.postForEntity(departmentUri, null, String.class);
        LOG.info("Withdraw Response: \n" + responseEntity.getBody());
        return responseEntity;
    }

    /**
     * Send an HTTP request to the service to deposit amount into the provided account identity
     *
     * @param accountId The account Identity
     * @param amount    The amount to be deposited
     * @return HTTP Response from the service
     */
    private ResponseEntity<String> deposit(String accountId, double amount) {
        URI departmentUri = UriComponentsBuilder.fromUri(URI.create(departmentTwoEndpoint))
                .path("/accounts")
                .path("/" + accountId)
                .path("/deposit")
                .queryParam("amount", amount)
                .build()
                .toUri();

        ResponseEntity<String> responseEntity = restTemplate.postForEntity(departmentUri, null, String.class);
        LOG.info("Deposit Response: \n" + responseEntity.getBody());
        return responseEntity;
    }

}

Note that this simplistic implementation of the transfer service at least considers the possibility that the deposit service fails and if so attempts to redeposit the withdrawn amount back into the source account.  However as should be obvious, it’s possible that the redeposit fails thus leaving the funds in limbo.

Here is the code providing the REST service interface for withdraw for Department1:

@RequestMapping(value = "/{accountId}/withdraw", method = RequestMethod.POST)
    public ResponseEntity<?> withdraw(@PathVariable("accountId") String accountId, @RequestParam("amount") double amount) {
        try {
            this.accountOperationService.withdraw(accountId, amount);
            return ResponseEntity.ok("Amount withdrawn from the account");
        } catch (NotFoundException e) {
            return ResponseEntity.status(HttpStatus.NOT_FOUND).body(e.getMessage());
        } catch (UnprocessableEntityException e) {
            LOG.error(e.getLocalizedMessage());
            return ResponseEntity.status(HttpStatus.UNPROCESSABLE_ENTITY).body(e.getMessage());
        } catch (Exception e) {
            LOG.error(e.getLocalizedMessage());
            return ResponseEntity.internalServerError().body(e.getLocalizedMessage());
        }
    }

The withdraw service calls the withdraw method on the accountOperationService, Here is the code providing the withdraw method used by the above REST service. It uses an injected EntityManager for JPA:

/**
 * Service that connects to the accounts database and provides methods to interact with the account
 */
@Component
@RequestScope
@Transactional
public class AccountOperationService implements IAccountOperationService {

    private static final Logger LOG = LoggerFactory.getLogger(AccountOperationService.class);

    @Autowired
    EntityManager entityManager;

    @Autowired
    IAccountQueryService accountQueryService;

    @Override
    public void withdraw(String accountId, double amount) throws UnprocessableEntityException, NotFoundException {
        Account account = accountQueryService.getAccountDetails(accountId);
        if (account.getAmount() < amount) {
            throw new UnprocessableEntityException("Insufficient balance in the account");
        }
        LOG.info("Current Balance: " + account.getAmount());
        account.setAmount(account.getAmount() - amount);
        account = entityManager.merge(account);
        entityManager.flush();
        LOG.info("New Balance: " + account.getAmount());
        LOG.info(amount + " withdrawn from account: " + accountId);
    }

    @Override
    public void deposit(String accountId, double amount) throws NotFoundException {
        Account account = accountQueryService.getAccountDetails(accountId);
        LOG.info("Current Balance: " + account.getAmount());
        account.setAmount(account.getAmount() + amount);
        account = entityManager.merge(account);
        entityManager.flush();
        LOG.info("New Balance: " + account.getAmount());
        LOG.info(amount + " deposited to account: " + accountId);
    }
}

The withdraw method gets the current account balance and checks for sufficient funds and throws an exception if insufficient funds. Otherwise it updates the account balance and saves the account. We can also see the deposit method which gets the current account balance, adds the amount to deposit and saves the updated account information.

What About Failures?


The developer of this teller service realizes there might be some failure scenarios to handle. For example, what happens if the deposit request fails? The developer solved that by having the teller service takes the corrective measure of redepositing the money back into the first account. Problem solved. But what happens if between the time of the withdrawal request and the request to redeposit the funds the teller microservice dies? What happens to the funds that were withdrawn? As it stands, they’re lost!

The developer could solve this problem by creating a table of pending operations that could be examined when the teller microservice starts up. But that would also mean that the deposit service must be idempotent as the only thing the teller service can do is retry the deposit request until it succeeds at which point it would remove the entry from its pending operations table. Until the deposit succeeds, the funds are basically in limbo and inaccessible to the account owner or anyone else.

So far, the developer has only handled some of the possible failures by adding error recovery logic into their microservice. And this is only for a trivial microservice. As more state information is updated, more complex recovery mechanisms may need to be added to the microservice. In the next post, we’ll look at how we can apply the saga pattern to solve this data consistency problem using Eclipse MicroProfile Long Running Actions, coordinated by MicroTx.

Source: oracle.com

Wednesday, February 21, 2024

Oracle Database 23c: New feature - Direct Joins for UPDATE and DELETE Statements

Oracle Database 23c introduces a host of powerful features aimed at enhancing database performance and query optimization. Among these innovations, Direct Join stands out as an efficient mechanism to streamline update and delete operations involving multiple related tables.

23c now allows you to use direct joins to other tables in UPDATE and DELETE statements in the FROM clause, in this article we will use SQL code examples to HR schema, so you can practice and learn it.

The main benefit is to make the coding of these Direct Joins simpler, using less code and more readable for SQL developers.

Scenario 1: Updating Salaries based on Department and City


Consider the scenario where we need to update the salaries of employees working in the Marketing department in the city of Toronto by increasing their salaries by 10%.

Prior to Oracle Database 23c, we might have used a query similar to this:

Oracle Database 23c: New feature - Direct Joins for UPDATE and DELETE Statements

Oracle Database 23c: New feature - Direct Joins for UPDATE and DELETE Statements

Once we identify the records that need to be updated, we proceed to design our UPDATE statement to modify only those records. Therefore, in Oracle versions prior to 23c, the filter used in the UPDATE statement is quite similar to the filter used in the SELECT statement.

Prior to Oracle Database 23c, the common approach to formulate the UPDATE statement involved employing an inner query within the WHERE clause.

Oracle Database 23c: New feature - Direct Joins for UPDATE and DELETE Statements

Oracle Database 23c: New feature - Direct Joins for UPDATE and DELETE Statements

However, in 23c, we can harness the power of Direct Join to optimize this update operation:

Oracle Database 23c: New feature - Direct Joins for UPDATE and DELETE Statements

Oracle Database 23c: New feature - Direct Joins for UPDATE and DELETE Statements

By utilizing Direct Join, we simplify the query, eliminate subqueries, and improve overall performance.

Scenario 2: Delete employee Neena's job history where she worked as AC_ACCOUNT


Suppose we need to delete employee Neena's job history where she worked as AC_ACCOUNT.

Prior to Oracle Database 23c, we might have used a query similar to this:

Oracle Database 23c: New feature - Direct Joins for UPDATE and DELETE Statements

Oracle Database 23c: New feature - Direct Joins for UPDATE and DELETE Statements

Once we identify the records that need to be deleted, we proceed to design our DELETE statement to remove only those records. Therefore, in prior to 23c, the filter used in the DELETE statement is quite similar to the filter used in the SELECT statement.

Prior to Oracle Database 23c, the common approach to formulating the DELETE statement involved employing a subquery or inner query within the WHERE clause.

Oracle Database 23c: New feature - Direct Joins for UPDATE and DELETE Statements

Oracle Database 23c: New feature - Direct Joins for UPDATE and DELETE Statements

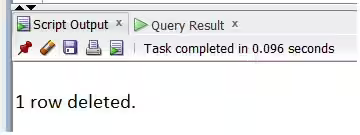
However, 23c, we can harness the power of Direct Join to optimize this DELETE operation:

Oracle Database 23c: New feature - Direct Joins for UPDATE and DELETE Statements

Oracle Database 23c: New feature - Direct Joins for UPDATE and DELETE Statements

Oracle Database 23c: New feature - Direct Joins for UPDATE and DELETE Statements

Source: oracle.com

Friday, February 16, 2024

MicroTx Enterprise Edition Features

Oracle recently announced the availability of MicroTx Enterprise Edition. This new release adds many new enterprise features making MicroTx Enterprise Edition suitable for a wide variety of enterprise applications. This blog post will go into the details of these new features.

No Limit on Transaction Throughput


One of the most important changes in the MicroTx Enterprise Edition is the elimination of the transaction throughput limit. MicroTx Free only allows 4,800 transactions per hour as it is intended for development and not production or enterprise deployments. With the release of MicroTx Enterprise Edition, this limitation no longer exists and MicroTx Enterprise Edition deployments can handle hundreds to thousands of transactions per second. This level of throughput exceeds the requirements of almost all applications. To put transaction volumes in perspective, Visa claims to have processed 276 billion transactions in the 12 months ending in September 30, 2023, which works out to an average of 8,700 transactions per second.

Admin Console


Enterprise users need a way to monitor and manage their distributed transactions. With the new administration console added to MicroTx Enterprise Edition, users can observe what transactions are in flight, performance metrics for the coordinator cluster, commit/rollback transactions with heuristic outcomes, and more.

MicroTx Enterprise Edition Features

Transaction Coordinator Clusters


For enterprise users, this release of MicroTx Enterprise Edition provides greatly improved reliability, availability, scalability, and performance (RASP) features. Much of this comes from a couple of key features including the ability to run multiple copies of the MicroTx Enterprise Edition transaction coordinator as part of a cluster. This allows MicroTx Enterprise Edition to scale out and scale in to meet the demands of your application. Should you need more transaction throughput, you can simply increase the number of replicas of the MicroTx Enterprise Edition transaction coordinator. 

For the clustering support to improve performance, the service mesh to which MicroTx Enterprise Edition is deployed must support request affinity. This means that requests from an initiator and the other participants in a transaction will land on the same transaction coordinator instance. This is typically provided by the service mesh by hashing some HTTP header and using that hash to determine which transaction coordinator instance the request should be delivered to. This also allows the transaction coordinator to cache transaction state in memory as all related requests will usually end up on the same instance. Should a request, as part of a transaction, land on a different instance due to failure or scaling operations, that instance can recover the transaction state from the persistent transaction state maintained in etcd or Oracle Database.

Persistent Transaction State


To ensure transactions can be properly handled in the presence of failures, the state of the transaction needs to be persisted in case a transaction coordinator fails. MicroTx Enterprise Edition supports persisting transaction state to either etcd or Oracle Database. Either can be used just by setting the appropriate configuration information.

By storing the transaction state in a shared persistent store, the MicroTx Enterprise Edition transaction coordinator can recover from a variety of failures. Should a coordinator instance fail, another transaction coordinator can take over handling any inflight transactions being processed by the failed coordinator. Whether that failure is a crash, network failure, operator error, or pretty much any other reason, subsequent requests will be handled by one of the remaining transaction coordinator instances. This ensures transactions can be successfully processed even amid most failures. There are always some failures that can cause a heuristic outcome, such as a database prematurely committing or rolling back its portion of a transaction.

RAC Support for XA Transactions


Oracle RAC databases require that transaction branches not span RAC instances. This means a transaction manager must be aware of the RAC instance participants are using, or use singleton database services that are only active on one RAC instance at a time. MicroTx Enterprise Edition handles this by having the RAC instance ID reported to the transaction coordinator when a participant microservice enlists in a transaction. This allows the coordinator to determine if a new transaction branch is required or not. Without this capability, microservices using a RAC database would have to use singleton database services.

Common XID


In the XA pattern for distributed transactions, each transaction branch needs to be prepared and committed. More branches equates to more messages that need to be sent when committing the transaction. To help prevent the proliferation of transaction branches, MicroTx Enterprise Edition will try to reuse branches if possible. It does this by having the participants report what resource manager they’re using when they enlist in the transaction. The coordinator uses this information to decide if a new transaction branch needs to be created. If there is already an existing transaction branch in the resource manager, the coordinator will return the same XID (global transaction identifier and branch qualifier), thus eliminating the need for another branch. If this is the first time the resource manager is being enlisted in the transaction, the coordinator will return a new unique branch qualifier. In the case where all participants are using the same resource manager such as Oracle database, the transaction will be committed one phase saving a lot of messages and eliminating the need for the coordinator to write to its transaction log. This can result in dramatic performance improvements.

XA Transaction Promotion


When starting an XA transaction, if enabled, MicroTx Enterprise Edition will actually start a local transaction. The transaction will remain a local transaction until such time as another participant may become involved in the transaction. At that point, MicroTx Enterprise Edition will promote the local transaction to a full XA transaction. This makes the cost of starting a transaction minimal until such time it may need to be promoted. Currently the decision to promote occurs whenever a call is made to another microservice. At that point MicroTx Enterprise Edition promotes the transaction even though the called microservice may not end up being a participant.This currently only works with Oracle database.

Grafana Dashboard


Included in the MicroTx Enterprise Edition release are Grafana dashboards. The MicroTx Enterprise Edition coordinator provides metrics that can be collected by Prometheus and visualized using Grafana as shown in this picture.

MicroTx Enterprise Edition Features

Summary

This new Enterprise Edition of MicroTx provides all the features, performance, and resiliency required for enterprise applications. Developer should feel comfortable relying on MicroTx Enterprise Edition to help address their data consistency requirements in microservice based applications. Start with MicroTx Free while developing and testing your microservices, and then switch to MicroTx Enterprise Edition when it comes time to move to production.

Source: oracle.com

Monday, August 28, 2023

Oracle Graph Server REST API

Oracle Graph is a powerful tool designed to uncover hidden relationships within your data. By representing information in a graph structure, Oracle Graph enables organizations to gain valuable insights from interconnected data entities. The Oracle Graph offering includes the Graph Server REST API, a gateway to utilize the capabilities of Oracle Graph from any application with a simple REST call. This API allows developers to interact with their graphs, enabling them to create graphs, run queries, and derive actionable information from their data.

Oracle Graph REST API v1 employs cookie-based authentication and encodes queries within URLs. In Oracle Graph Server and Client release 23.3 we released Oracle Graph REST API v2, which adopts token-based authentication and allows queries to be transmitted within the JSON body. The Graph Server REST API provides a vital resource for developers to easily create and query graphs.

Background for the following examples:


◉ Oracle Graph includes the ability to run graph queries in Oracle Database, and also run graph queries and analytics in a specialized in-memory Graph Server (PGX).  
◉ To load data from the bank_graph example and create a graph.

Graph Server REST API v2


Let’s run through a simple example using version 2 of the Graph Server REST API with Postman. For all of the following API calls, ensure that the request has the following headers:

◉ Accept: application/json; charset=UTF-8
◉ Content-Type: application/json

1. Get Authentication Token

Create a POST request to https://<Graph_Server_IP>:7007/auth/token. Add a JSON body with the username, password and createSession parameters.

Set the createSession parameter to True if you want to create a PGX session to run queries in the in-memory Graph Server, or False if you are running queries in the database.

The response should be an access token, which we will use in the next API calls.

Oracle Graph Server REST API, Oracle Database, Oracle Database Career, Oracle Database Skills, Oracle Database Job, Oracle Database Prep, Oracle Database Preparation, Oracle Database Guides, Oracle Database Learning

2. Get Graphs

Create a GET request to https:// <Graph_Server_IP>:7007/v2/graphs, with a query parameter for the driver you want to use (GRAPH_SERVER_PGX, PGQL_IN_DATABASE or SQL_IN_DATABASE). The resulting query string should look like https:// <Graph_Server_IP>:7007/v2/graphs?driver=pgql_in_database.

Add an Authorization header with the value 'Bearer <access_token>'.

The response should be a list of graphs for your authenticated user.

Oracle Graph Server REST API, Oracle Database, Oracle Database Career, Oracle Database Skills, Oracle Database Job, Oracle Database Prep, Oracle Database Preparation, Oracle Database Guides, Oracle Database Learning

3. Run a Query

Create a POST request to https:// <Graph_Server_IP>:7007/v2/runQuery.

Add an Authorization header with the value 'Bearer <access_token>'.

Add a JSON body with the statements, driver, formatter, parameters and visualize parameters, following this example:

{
  "statements": [
    "SELECT v FROM MATCH (v) ON BANK_GRAPH LIMIT 1"
  ],
  "driver": "PGQL_IN_DATABASE",
  "formatter": "GVT",
  "parameters": {
    "dynamicSampling": 2,
    "parallel": 8,
    "start": 0,
    "size": 100
  },
  "visualize": true
}

The result should be a JSON object with the result of the query run.

Oracle Graph Server REST API, Oracle Database, Oracle Database Career, Oracle Database Skills, Oracle Database Job, Oracle Database Prep, Oracle Database Preparation, Oracle Database Guides, Oracle Database Learning

4. Refresh Access Token

To refresh your access token before it expires, create a PUT request to https://<Graph_Server_IP>:7007/auth/token.

Add a JSON body with token and createSession parameters. The token should have the value for the current access token. Set the createSession parameter to True if you want to create a PGX session to run queries in the in-memory Graph Server, or False if you are running queries in the database.

The response should be the new access token.

Oracle Graph Server REST API, Oracle Database, Oracle Database Career, Oracle Database Skills, Oracle Database Job, Oracle Database Prep, Oracle Database Preparation, Oracle Database Guides, Oracle Database Learning

For more information on v2 of the Graph Server REST API and a full list of functionalities, visit the official documentation.

Graph Server REST API v1


Let’s run through a simple example using version 1 of the Graph Server REST API with Postman. For all of the following API calls, ensure that the request has the following headers:

◉ Accept: application/json; charset=UTF-8
◉ Content-Type: application/json

1. Authenticate user

Create a POST request to https://<Graph_Server_IP>:7007/ui/v1/login/.

Add a JSON body with username, password, pgqlDriver and baseUrl parameters. The pgqlDriver parameter specifies if you want to connect to the database, using pgqlDriver, or to Graph Server, using pgxDriver. The baseUrl parameter should be the url of Graph Server if you are using the pgxDriver, or the JDBC url for your database if you are using the pgqlDriver.

The response should be the username of the user who has been authenticated. On successful login, the server session cookie is stored in a cookie file, cookie.txt.

Oracle Graph Server REST API, Oracle Database, Oracle Database Career, Oracle Database Skills, Oracle Database Job, Oracle Database Prep, Oracle Database Preparation, Oracle Database Guides, Oracle Database Learning

2. List Graphs

Create a GET request to https://<Graph_Server_IP>:7007/ui/v1/graphs. The cookie should be automatically added as a header in Postman.

The response should be a list of graphs for your authenticated user.

Oracle Graph Server REST API, Oracle Database, Oracle Database Career, Oracle Database Skills, Oracle Database Job, Oracle Database Prep, Oracle Database Preparation, Oracle Database Guides, Oracle Database Learning

3. Run Query

Create a Get request to https://<Graph_Server_IP>:7007/ui/v1/query, with pgql, graph, parallelism and size parameters. The resulting url should look like:

https://<Graph_Server_IP>:7007/ui/v1/query?pgql=<PGQL_query>&graph=<graph_name>&parallelism= <parallelism_value>&size=<size>

For example to query five edges from bank_graph, we can use the following: https://<Graph_Server_IP>:7007/ui/v1/query?pgql=SELECT%20e%0AMATCH%20()-%5Be%5D-%3E()%0ALIMIT%205&graph=BANK_GRAPH&parallelism=&size=100

The result should include the resulting vertices and edges queried in a JSON format.

Oracle Graph Server REST API, Oracle Database, Oracle Database Career, Oracle Database Skills, Oracle Database Job, Oracle Database Prep, Oracle Database Preparation, Oracle Database Guides, Oracle Database Learning

4. Logout of Graph Server

Create a POST request to https://<Graph_Server_IP>:7007/ui/v1/logout/.

On successful logout, the server should return HTTP status code 200 and the session token from the cookie.txt file will no longer be valid.

Oracle Graph Server REST API, Oracle Database, Oracle Database Career, Oracle Database Skills, Oracle Database Job, Oracle Database Prep, Oracle Database Preparation, Oracle Database Guides, Oracle Database Learning

Source: oracle.com

Friday, July 7, 2023

How to Integrate Oracle Real Application Security with APEX on Oracle Autonomous database

What is Oracle Real Application Security (RAS):


Oracle Real Application Security (RAS) is the industry's most advanced technology, supporting application security requirements. RAS is the next-generation fine-grained access control mechanism for the Oracle Database – similar to Oracle Virtual Private Database(VPD) but more flexible and easier to maintain. It provides an application access control framework within the database enabling n-tier applications to define, provision, and enforce their security requirements declaratively. Oracle RAS introduces a policy-based authorization model that recognizes application-level users, privileges, and roles within the database and then controls access to static and dynamic collections of records representing business objects. Like VPD, RAS lets you create a security policy once, and enforce that policy regardless of how the data is accessed – via the application, via SQL*Plus, or through other interactive mechanisms.

The out-of-the-box integration of Oracle RAS with Oracle APEX eliminates custom development for securing application data, thus providing end-to-end application security. 

Security enforcement in multi-tier applications using Oracle RAS:

Oracle Real Application Security, Oracle Autonomous Database, Oracle Database Skills, Database Jobs, Database Preparation, Database Tutorial and Materials

Use case:

Let’s suppose you want to restrict the application users “blake” & “king” to access only the rows belonging to the department ID 10 & 20, respectively, in the “emp” table under the “hr” schema. For this example, we'll use APEX as our developement framework.

High-level steps to achieve the use-case:

  1. Create a DB role and grant privileges on the table that you want to protect to the DB role.
  2. Create a RAS admin user and assign privileges to the RAS admin user.
  3. Create an application role and grant the DB role to the application role.
  4. Create application users and grant application roles to the application user.
  5. Enable RAS on the instance level in APEX by logging in as an admin user.
  6. Enable RAS on each application by logging into the APEX workspace.
  7. Create Security Class as required.
  8. Create ACLs and associate application roles to the ACLs
  9. Create Data Security Policy.
  10. Apply data security policy to the table.
  11. Access the table as an application user through APEX.
 
Below are the names used in this example:

Database schema       : HR

DB Table                      : EMP

RAS admin user          : RASADM

Database Role            : DB_EMP

Application Roles        : DEPT10 & DEPT20

Application Users        : BLAKE & KING

1. Create a DB role by logging in to the autonomous database as a database ADMIN user and grant privileges on the table that you want to protect to the DB role.

Create the database role DB_EMP and grant this role the necessary table privileges.

create role db_emp;
grant insert,update,delete,select on hr.emp to db_emp;

2. Create a RAS admin user, “RASADM” and assign privileges to the RAS admin user.

create user rasadm;
password rasadm; --enter the password for RASADM
grant CREATE SESSION to rasadm;

Grant DB role created in step 1 to the RAS admin user.

grant db_emp to rasadm with admin option;

Real Application Security works the same on Autonomous Database as on an on-premises Oracle Database except you need to perform the following ADMIN tasks before using Real Application Security on Autonomous Database:

To create Real Application Security users/roles, you need the PROVISION system privilege.

As the ADMIN user run the following command to grant this privilege to a database user:

EXEC XS_ADMIN_CLOUD_UTIL.GRANT_SYSTEM_PRIVILEGE('PROVISION','RASADM');

To create Real Application Security data controls, you need the ADMIN_ANY_SEC_POLICY privilege.

As the ADMIN user run the following command to grant this privilege:

EXEC XS_ADMIN_CLOUD_UTIL.GRANT_SYSTEM_PRIVILEGE('ADMIN_ANY_SEC_POLICY','RASADM');

3. Create application roles by logging into the database as a RAS admin user, in this example (RASADM), and grant DB role to the application role.

Create application role:

exec sys.xs_principal.create_role(name => 'dept10', enabled => true);
exec sys.xs_principal.create_role(name => 'dept20', enabled => true);

Grant DB role to application role:

grant db_emp to dept10;
grant db_emp to dept20;

4. Create application users and grant application roles to the application users.

create application user “blake” and grant application role “dept10” to blake:

exec  sys.xs_principal.create_user(name => 'blake', schema => 'hr');
exec  sys.xs_principal.set_password('blake', '<PASSWORD>');
exec  sys.xs_principal.grant_roles('blake', 'XSCONNECT');
exec  sys.xs_principal.grant_roles('blake', 'dept10');

create application user “king” and grant application role “dept20” to king:

exec  sys.xs_principal.create_user(name => 'king', schema => 'hr');
exec  sys.xs_principal.set_password('king', '<PASSWORD>');
exec  sys.xs_principal.grant_roles('king', 'XSCONNECT');
exec  sys.xs_principal.grant_roles('king', 'dept20');

5. Enable RAS on the instance level first in APEX by logging in as an admin user.

Login to APEX as ADMIN user.

Oracle Real Application Security, Oracle Autonomous Database, Oracle Database Skills, Database Jobs, Database Preparation, Database Tutorial and Materials

Click on Manage Instance.

Oracle Real Application Security, Oracle Autonomous Database, Oracle Database Skills, Database Jobs, Database Preparation, Database Tutorial and Materials

Click on Security.

Oracle Real Application Security, Oracle Autonomous Database, Oracle Database Skills, Database Jobs, Database Preparation, Database Tutorial and Materials

Click on Real Application Security and ensure the option "Allow Real Application Security" is set to Yes. By default, this option is set to yes on the autonomous database.

Oracle Real Application Security, Oracle Autonomous Database, Oracle Database Skills, Database Jobs, Database Preparation, Database Tutorial and Materials

6. Enable RAS on application by logging into APEX workspace. In this example I am logging into HR workspace in APEX.

Oracle Real Application Security, Oracle Autonomous Database, Oracle Database Skills, Database Jobs, Database Preparation, Database Tutorial and Materials

Click on App Builder

Oracle Real Application Security, Oracle Autonomous Database, Oracle Database Skills, Database Jobs, Database Preparation, Database Tutorial and Materials

Click on the application that you want to enable RAS.

Oracle Real Application Security, Oracle Autonomous Database, Oracle Database Skills, Database Jobs, Database Preparation, Database Tutorial and Materials

Click on Shared Components.

Oracle Real Application Security, Oracle Autonomous Database, Oracle Database Skills, Database Jobs, Database Preparation, Database Tutorial and Materials

Click on Authentication Schemes.

Oracle Real Application Security, Oracle Autonomous Database, Oracle Database Skills, Database Jobs, Database Preparation, Database Tutorial and Materials

Select the default scheme – Oracle APEX accounts..

Oracle Real Application Security, Oracle Autonomous Database, Oracle Database Skills, Database Jobs, Database Preparation, Database Tutorial and Materials

Click on Real Application Security.

Oracle Real Application Security, Oracle Autonomous Database, Oracle Database Skills, Database Jobs, Database Preparation, Database Tutorial and Materials

Enable the RAS Mode by selecting Internal Users or External Users based on the requirement. In this example, I am opting for Internal Users and click on Apply Changes.

Oracle Real Application Security, Oracle Autonomous Database, Oracle Database Skills, Database Jobs, Database Preparation, Database Tutorial and Materials

7. Create Security Class as required.

If there’s any requirement to mask any column or row data to a specific user, then you can use a security class to achieve the same. I am skipping security class creation as it’s out of scope for this use case.

8. Create ACLs and associate application roles(dept10 & dept20) with the ACLs.

Create ACLs:

declare 
  aces xs$ace_list := xs$ace_list(); 
begin
  aces.extend(1);
 -- DEPT10_ACL:  This ACL grants dept10(application role) the privilege to view and update all
 --          employees records in hr.emp table.
  aces(1):= xs$ace_type(privilege_list => xs$name_list('select', 'insert',
                                        'update', 'delete'),
                        principal_name => 'dept10');
   sys.xs_acl.create_acl(name      => 'dept10_acl',
                    ace_list  => aces);
 end;
/

declare 
  aces xs$ace_list := xs$ace_list(); 
begin
  aces.extend(1);
 -- DEPT20_ACL:  This ACL grants dept20(application role) the privilege to view and update all
  --          employees record in hr.emp table.
  aces(1):= xs$ace_type(privilege_list => xs$name_list('select', 'insert',
                                        'update', 'delete'),
                        principal_name => 'dept20');
  sys.xs_acl.create_acl(name      => 'dept20_acl',
                    ace_list  => aces);
 end;
/

9. Create Data Security policy “emp_ds”.

declare
  realms   xs$realm_constraint_list := xs$realm_constraint_list();     
begin 
  realms.extend(1);
  -- Realm #1: Only the department number10
  --           blake can view the realm with deptno 10.
  realms(1) := xs$realm_constraint_type(
    realm    => 'deptno = 10',
    acl_list => xs$name_list('dept10_acl'));

  sys.xs_data_security.create_policy(
    name                   => 'emp_ds',
    realm_constraint_list  => realms);
end;
/

10. Apply data security policy to the table.

begin
  sys.xs_data_security.apply_object_policy(
    policy => 'emp_ds',
    schema => 'hr',
    object =>'emp');
end;
/

You can append more realms to the same data security policy using the below command:

This allows user king to view realm with deptno 20

DECLARE
  realm_cons XS$REALM_CONSTRAINT_TYPE;     
BEGIN 
  realm_cons :=
    XS$REALM_CONSTRAINT_TYPE(realm=> 'deptno = 20',
                             acl_list=> XS$NAME_LIST('dept20_acl'));

  SYS.XS_DATA_SECURITY.APPEND_REALM_CONSTRAINTS( policy=>'emp_ds', 

realm_constraint=>realm_cons);

END;

11. Now, access the table as an application user through APEX. I followed the below steps to achieve the same.

Log into the workspace.

Oracle Real Application Security, Oracle Autonomous Database, Oracle Database Skills, Database Jobs, Database Preparation, Database Tutorial and Materials

Click on ‘Administration’ and select ‘Manage Users and Groups’.

Oracle Real Application Security, Oracle Autonomous Database, Oracle Database Skills, Database Jobs, Database Preparation, Database Tutorial and Materials

Click on create user. Create the same application users created in Step 4.

Oracle Real Application Security, Oracle Autonomous Database, Oracle Database Skills, Database Jobs, Database Preparation, Database Tutorial and Materials

Provide the mandatory details: Username, Email Address & Password and click on Create User. Repeat this step to create all the application users. In this example I am creating the users "blake" & "king".

Oracle Real Application Security, Oracle Autonomous Database, Oracle Database Skills, Database Jobs, Database Preparation, Database Tutorial and Materials

Now,  create the application roles in APEX. Create the same application roles created in step 3.

For this click on app-builder, then select the application, and click on shared components.

Oracle Real Application Security, Oracle Autonomous Database, Oracle Database Skills, Database Jobs, Database Preparation, Database Tutorial and Materials

Click on Application Access Control.

Oracle Real Application Security, Oracle Autonomous Database, Oracle Database Skills, Database Jobs, Database Preparation, Database Tutorial and Materials

Click on Add Role.

Oracle Real Application Security, Oracle Autonomous Database, Oracle Database Skills, Database Jobs, Database Preparation, Database Tutorial and Materials

Provide the role name and description(optional) and click on Create Role. Repeat this step to create all the application roles.

In this example, I am creating the application roles "dept10" & "dept20".

Oracle Real Application Security, Oracle Autonomous Database, Oracle Database Skills, Database Jobs, Database Preparation, Database Tutorial and Materials

In the same window, scroll down and click on “Add User Role Assignment”. This associates the application role created above with the application user.

Oracle Real Application Security, Oracle Autonomous Database, Oracle Database Skills, Database Jobs, Database Preparation, Database Tutorial and Materials

Provide the application User Name, check the Application Role you want to assign the user to and then click on Create Assignment.

Oracle Real Application Security, Oracle Autonomous Database, Oracle Database Skills, Database Jobs, Database Preparation, Database Tutorial and Materials

You’ll be able to see the role and assignments as shown below.

Oracle Real Application Security, Oracle Autonomous Database, Oracle Database Skills, Database Jobs, Database Preparation, Database Tutorial and Materials

Now run the application by providing the application username and password.

In this example I am logging in as "blake" user.

Oracle Real Application Security, Oracle Autonomous Database, Oracle Database Skills, Database Jobs, Database Preparation, Database Tutorial and Materials

Click on the table.

Oracle Real Application Security, Oracle Autonomous Database, Oracle Database Skills, Database Jobs, Database Preparation, Database Tutorial and Materials

You’ll see only the rows that the user is allowed to see.

In this example, the application user “blake” could see only the rows belonging to the department number 10.

Oracle Real Application Security, Oracle Autonomous Database, Oracle Database Skills, Database Jobs, Database Preparation, Database Tutorial and Materials

Source: oracle.com